 Isn’t it fascinating to observe your pals and classmates sipping from stylish tumblers? Since discovering how to construct my own epoxy resin tumbler, I’ve been craving the same chic tumbler in my hands.
When it comes to a good tumbler, there is nothing better. They are sturdy, insulated, and fashionable, allowing us to bring our favorite drinks wherever we go.
Why not make it a fashionable accessory if you carry it around wherever you go? You may purchase a sophisticated one, but nothing shows off your individuality like a handcrafted one from the good old days.
Tumblers made out of epoxy may be customized to your liking. And if you have the necessary supplies and follow the steps, you can create your own.
Table of Contents
Which Tumblers To Choose –
If you’re wondering which tumbler to epoxy, you’re not alone. There are, of course, a plethora of tumblers to choose from.
Kleen Kanteen, Hydroflask, and Yeti are some of today’s most popular brands. These tumblers are long-lasting, rust-proof, BPA-free, and dishwasher safe.
They insulate and repel heat and cold. Plastic tumblers are available too, but make sure you avoid the tumblers having Bisphenol A (BPA).
Now that you have decided to shine with your custom-made tumbler, these are the supplies you need to make your epoxy resin tumbler.
Supplies needed For making Epoxy resin Tumbler –
 1. The Gloves that Fits a Tumbler
2. A device for rotating a tumbler
3. Propyl alcohol is the chemical name for this substance.
4. A pair of wooden sticks
5. Epoxy resin (Check the best epoxy resins for tumblers).
6. Sandpaper
7. Tape-measure cups
8. Painter’s goggles or glasses for spraying
9. A roll of paper towels
Let the Process Begin –
When things are already beside you, then let’s have a perfect start for the process of making your own epoxy resin tumbler.
1. During the beginning, clean your tumbler with Isopropyl alcohol. Since isopropyl alcohol can help clean surfaces, it can also be used to clean the interior of tumblers. To clean your tumblers with isopropyl alcohol:
1) Start by adding 1 cup of rubbing alcohol to a clean bowl.
2) Add 1/4 cup of water to the bowl and mix everything together.
3) Use a clean cloth to wipe down the inside of your tumblers with the solution.
4) Rinse the tumblers with clean water and allow them to air dry.
 2. Depending on the tumbler, tape the top lip or don’t. I strongly suggest leaving the tumbler lip epoxy-free since you wouldn’t prefer a tip made from epoxy resin.
3. Sand the tumbler as indicated. For more accessible decoration, use a tumbler turner, i.e., the device you got for rotating tumblers.
4. Let your imagination run wild at this moment! You can use any spray color of your choice on your Tumbler. Dark-colored spray paint was sprayed multiple times. You may go colorful or essential. Work in a well-ventilated environment and observe safety precautions.
5. Wait an entire day for whatever paint you’ve applied to dry thoroughly on your tumbler turner. To prevent a mess, place plastic under your tumbler.
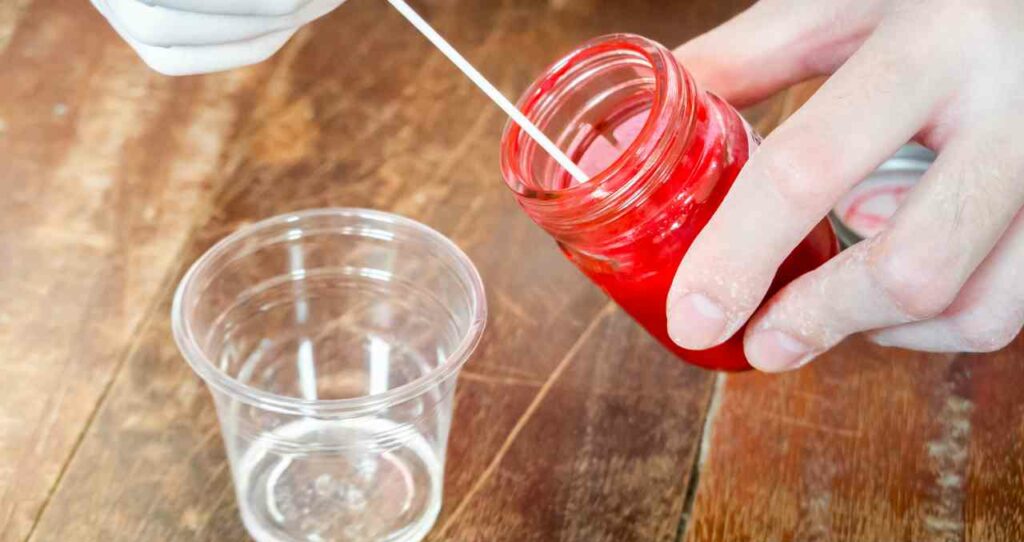
6. Letting your tumbler dry on the turner, get your epoxy equipment. Mix thoroughly with gloves on. Without gloves, you risk getting chemicals on your skin that can cause irritation or even burns.
7. Apply epoxy using a tumbler turner. Use gloves to distribute the resin. To marbleize, combine resin and white color. Using a popsicle stick, create white streaks on the spinning tumbler.
8. How many epoxy coatings should a tumbler have? This might be the question you might be wondering? Well, the average is 2-3 coats.
9. Use a resin finish to seal all the layers underneath. This will provide extra protection from moisture and keep your tumblers looking like new for years to come.
10. You can also mix Alumilite glitter with your epoxy if you want to make glitter tumblers.
11. Then, pour some resin into your tumbler and smooth it with your fingertips. When applying epoxy, gather up any drips. Reusing it reduces waste.
 12. Let your item dry and cure according to the manufacturer’s instructions to ensure a tack-free finish. No product you apply will be moist or flake.
13. Your artwork is finished. Your sleek new tumbler is portable. Make matching mugs for close family and friends. Our cured resin resists moisture, wear and tear, and corrosion.
Now that I’ve spoken about the procedure, let’s look at some of the things you need to keep in mind while producing your own epoxy resin tumblers.
Things to Keep in Mind –
1. Keep gloves and eye protection while handling epoxy.
The epoxy may aggravate the eyes and skin. Wear gloves and eye protection around epoxy. Soap and water will remove epoxy off the skin. Epoxy is tenacious and hard to remove when liquid.
If you want to remove epoxy from your skin, you should use a pumice stone, but you should NOT use alcohol or acetone. Reason is that alcohol and acetone will dry out your skin, making the epoxy harder to remove.
2. Take Care to Work in a Well-ventilated Environment –
As a chemical, epoxy must be utilized in a well-ventilated location. Open windows and doors, and turn on the fan where you work. I recommend putting your epoxy on a screened-in back porch to keep the toxins away from your home.
You may also want to use a respirator when working with epoxy. Epoxy fumes can be dangerous, and you don’t want to breathe them in.
3. Avoid skin contact by wearing an APRON/SUIT –
 It’s easy for the epoxy to touch your skin if you have epoxy on your clothes. Epoxy also leaves a permanent stain on garments; removing it isn’t easy. If you’re dealing with epoxy, wear a PVC apron.
This will protect your clothes and make removing the epoxy from your body easier when you’re done.
4. Cleanse your surroundings for epoxy safety –
Protect your workspace against epoxy spills and drips. Protect surfaces with throwaway plastic sheets. Electrical tape may retain the plastic in place and protect tumbler rims and bottoms from epoxy.
You’ll spend hours cleaning up hardened epoxy if you don’t protect your work area.
5. The tumbler’s lip should clean any epoxy resin residue –
If you find that any epoxy has gotten beneath your tape, just use a sharp knife or sandpaper to remove it. Wet a towel to remove sandpaper dust. Wash your tumbler with warm water and soap before use.
Conclusion –
Your DIY epoxy resin tumbler is now complete! If you doubt this is the right project for you, I say go ahead and have some fun with it. Experimenting with various materials and methods may be a lot of fun sometimes.
Even if this is your first time doing anything like this, it shouldn’t be too harsh for you.
Even though you may think you’re in over your head, putting epoxy on a tumbler is relatively straightforward. Even if something doesn’t work out, you’re still acquiring new skills and advancing your knowledge.
It’s all part of the fun and the learning process, after all!
Make your own tumblers and see what works best for you. By following these steps, you’ll be able to turn your DIY glitter tumbler into something special.