
Polymer clay is a versatile medium that you can use to create all sorts of different projects – from figurines to accessories. And, if you want to take your work up a notch, you can add UV resin to give it a glossy and shiny finish.
In this tutorial, we’ll show you how to do just that. So, this guide is for you whether you’re a beginner or an experienced crafter! Keep reading for step-by-step instructions.
We’ll also give you tips on working with the resin for the best results. So, if you’re looking for a new way to add interest to your polymer clay projects, be sure to check out this tutorial!
Now, let’s start with a small definition.
Table of Contents
What is UV Resin –
UV resin is a type of hard plastic that cures, or hardens when exposed to ultraviolet light. It is often used in crafts and jewelry making, as it can be used to create various shapes and designs.
UV resin is also durable and water-resistant, making it a good choice for outdoor projects. While UV resin is typically clear, it can also be dyed or pigmented to create different colors and effects.
It can also be mixed with other materials, such as glitter or beads to create unique embellishments. Overall, UV resin is a versatile material that can be used in various ways.
Things Required to use UV resin with Polymer clay –
1. UV Resin – You can use your preferred UV resin or check the best UV resin for polymer clay if you need suggestions.
2. Polymer Clay – I use Cernit, but you can use Fimo, Sculpey, or any other oven-bake clay.
3. Mixing Cups – I use these little dixie cups, but you can use anything that will hold your resin.
4. Mixing Sticks – I use popsicle sticks, but you can use anything that will stir your resin.
5. UV Lamp – You can use a UV Lamp to cure your resin(check the best ones).
6. Glitter, Mica Powder, Confetti – These are all optional, but they can be used to add some extra pizzazz to your UV Resin(check the best Glitter and Mica)
Let’s start the Process –
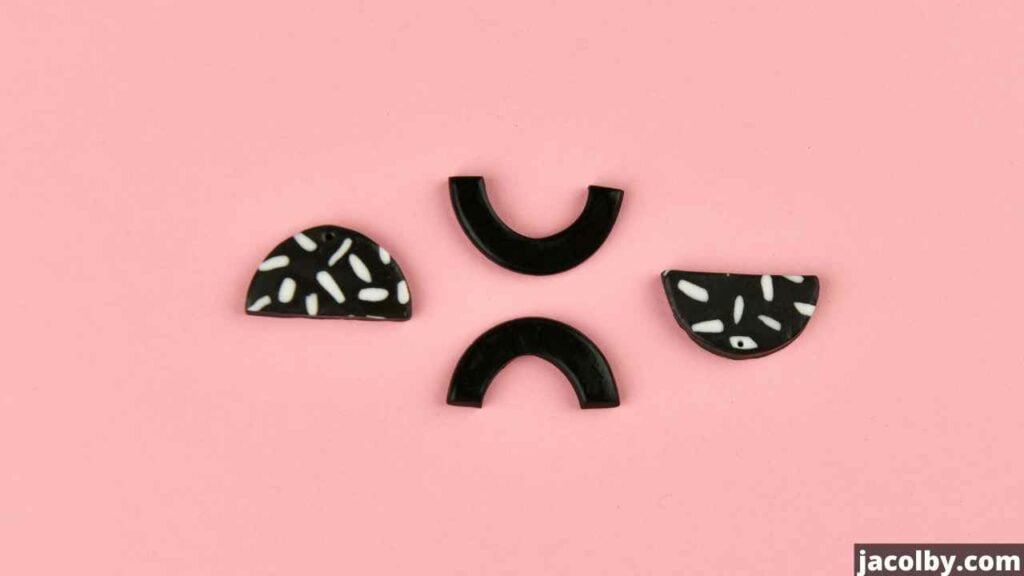
1. Seal the Polymer Clay Bits –

This method of applying UV resin is most commonly used when dealing with polymer clay. The clay object must be arranged appropriately on the tile to use this method.
After that, the UV resin should be dispensed in a way that forms domes out of the clay pieces. To do this, start in the center, and add a suitable quantity.
After that, using toothpicks, evenly distribute the resin throughout the container, moving outward from the container’s center toward its four corners. The resin must be distributed to the outer borders of the clay pieces as much as possible.
You will need to withdraw it from the edge in a very delicate manner to prevent the toothpick from cracking when you do so. After this, place the thing for around five minutes under ultraviolet light.
The clay piece will look like a dome after it has had a chance to dry out after being treated with this substance.
2. Cleaning the Polymer clay pieces with a brush –
You may use this method to acquire the finish you want when you want the surface of the clay item to be shiny but not thick. This is the case when you want to utilize this method.
To do this, put a little quantity of the resin inside a cup and set it alone for a moment. Long strokes should be used while applying the resin to the clay, and you should use a high-quality brush that you have already dipped in the liquid resin.
Use the brush to apply the glaze to the clay’s edges. After this, place the thing for around five minutes under ultraviolet light.
The clay item will have an excellent surface that is smooth to the touch when it is entirely dry and has had the chance to dry out. If you apply it with a brush in a thin layer, there will be no seeping off the edges. e it has dried
3. Preparing the Polymer Clay Pieces by Casting –
To do this, you will first need to get a mold that is of a good enough quality, and then you will need to fill the mold with a layer of the resin that is completely transparent. Using the toothpick, spread it evenly within the mold so it is completely covered.
This will guarantee that the mold is completely coated. You may also take advantage of this opportunity to develop your creative side by adding glitter to the resin and then spreading it out in the mold after you’ve done so.
This might be an enjoyable way for you to exercise your creative side. After this, put whatever is under a UV light anywhere in the neighborhood for five minutes.
When the clay has thoroughly dried out, the finished product will have a glistening and glittering aspect, and it will be stunningly beautiful to see.
4. Culinary Method for Baking Polymer Clay –
Instead, you may bake the resin if you want to use it as an adornment for jewelry and you want to use it. You will need to bake the dish for around thirty minutes at an oven temperature ranging from 275 to 300 degrees Fahrenheit.
After completing the curing process, you should have a piece of jewelry that looks like a crystal and is quite stunning.
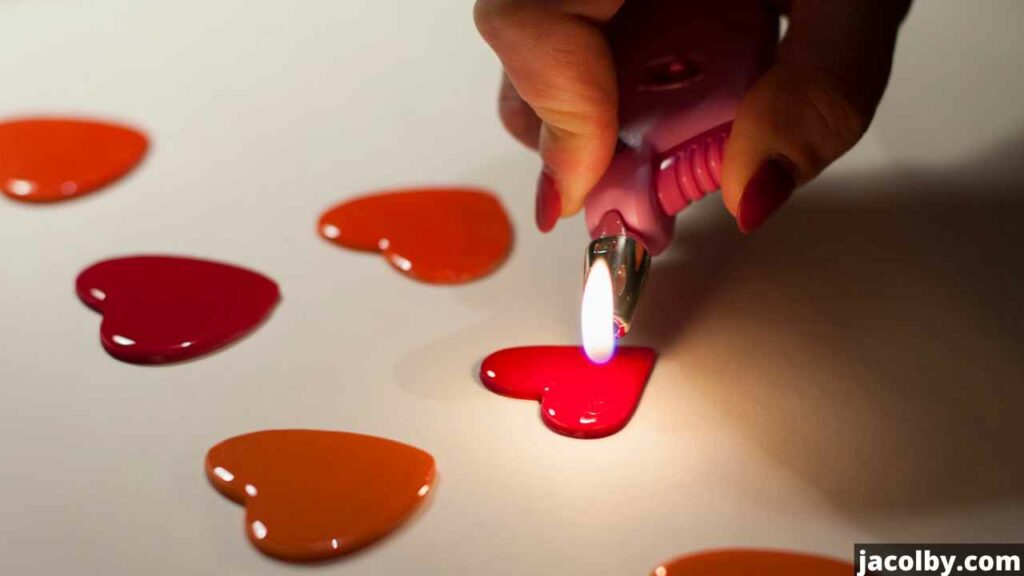
No matter the technique you choose to distribute the resin, there is a chance that bubbles will be produced in the process. In such a situation, quickly run the lighter over the clay piece to burst the bubble.
Some Helpful Hints and Suggestions –
When dealing with UV resin, patience is necessary if you want to achieve a fantastic finish for your project.
Taking your time, pouring the resin into thin layers, and letting those layers dry before going on to the next phase will help you prevent the accumulation of air bubbles in the resin.
That will necessitate their removal. Air bubbles may be a challenge to remove from the resin. Using a hot air dryer, you may swiftly get rid of any air bubbles that have formed within the resin.
If any air bubbles have been created, they will be eliminated. To do this, you will need to move the hair dryer over the resin quickly and continuously.
Take care to avoid being in one location for more than one or two seconds at the very most. Because the heat has the potential to produce the formation of vapors, you must carry out this procedure in a location that has enough ventilation.
In addition, it is of the highest importance that you protect yourself by donning gloves, goggles, and a face mask before engaging in the activity. Compared to epoxy resin in its more common form, UV resin is more susceptible to the effects of heat.
There have been reports of UV resins melting at temperatures as low as -100 degrees Celsius. Suppose the temperature is allowed to climb to an unsafe level.
In that case, an unpleasant odor will be created as a side effect. Because of this, the hot air drier’s temperature, if used at all, should be maintained at the lowest level that is reasonably achievable given the circumstances.
It is more likely to blister since numerous components are incorporated in the resin. This increases the likelihood that it may blister.
You need to make sure that the parts that are going to be embedded are put down flat on the layer of resin and that they are pressed deeply into the resin that has not yet been set to limit this to a minimum.
In addition, you need to make sure that the resin has not yet hardened.
FAQ –
How long do I need to bake the resin for?
You should bake the resin for at least 30 minutes to ensure that it is properly cured. However, you may need to bake it for longer if the resin is thick or if you are using multiple layers.
What is the best way to distribute the resin?
You can use a brush, spatula, or syringe to distribute the resin. You need to be careful not to create any air bubbles when you are doing this. You can also use a heat gun to remove any air bubbles that have formed.
How long should I wait before adding more resin to my project?
You should wait until the previous layer has completely dried before adding more resin to your project. Adding resin to a project that has not fully dried may cause air bubbles to form.
What happens if I accidentally get resin on my skin?
If you accidentally get resin on your skin, you should immediately wash the area with soap and water. If the resin has already dried, you may need to use a solvent to remove it.
How can I avoid getting bubbles in my resin?
You can do a few things to avoid bubbles in your resin. First, you can pour the resin slowly and carefully to avoid agitating it too much.
Second, you can use a heat gun to remove any bubbles that have already formed. Finally, you can try using a vacuum chamber to remove the air from the resin before curing it.
Conclusion –
I am hopeful that you will discover some use for the UV resin now that I have shown its flexibility to you. I would appreciate it if you could give these varied applications of the resin a try and get back to me with your opinions on how the results turned out.