
I get a lot of questions from aspiring beginner resin jewelry makers and crafters worldwide. Many of those questions involve how to make something creative using resin.
If you’re looking to incorporate jewelry making into your classroom or at home and don’t know where to commence, don’t worry; we will guide you on how to resin jewelry! Don’t let the idea of kitsch jewelry scare you.
This process can be appealing to all; I recently used this process with a group of jewelers and was shocked to see the results! Jewelry fans can easily create beautiful individual art pieces themselves using resin.
Due to the skill of the synthetic resin, there are practically no limits to creativity in design. The explicit crystal material becomes a real eye-catcher with minor incorporated constituents such as flowers, pearls, colored sand, or glitter particles.
The following article contains valuable tips and tricks, including instructions on making Resin Jewelry.
Table of Contents
Choosing Different Resin For Making Epoxy Jewelry –
Epoxy resin: has a nice, crystal clear surface and is therefore ideal for producing jewelry and accessories. The polyester resin dries very quickly and is also highly strong. Therefore, this resin is primarily used for molded parts such as in boat building or profile plates.
A so-called UV resin is an ultimate alternative for DIY enthusiasts who do not want to wait a few days for the material to cure completely. It does not have to be mixed with another component and cures completely under UV light using a unique flashlight within a few minutes.
However, it can cast only relatively thin layers. However, since jewelry and accessories are usually relatively small pieces, this should not be a problem.
1. Prepare The Mold –

One fantastic thing about working with resin molds is that they can reuse them as long as they are adequately cared for. Before you begin the resin curing process, the molds have to be cleaned and prepared.
Wash them with soap and lukewarm water to ensure no pieces are left behind. Use the mold let out and conditioner to spray your molds–this will enable a more accessible release when you’re ready to take out the shapes.
You will want to make sure the molds are dry and hard before placing any resin middle items. You can use a variety of molds. Make sure they are flexible plastic or silicone to release resin shapes when cured easily.
If you use another aspect to fill with resin as a trivet, the release and conditioner spray is unnecessary as you want the resin to cure and permanently stay!
2. Mix Resin Steadily –
Although dissimilar different kinds of resin can be used, to mix, you will be using two different bottles: resin and hardener. Measure equal parts of both and mix them. You can use a tablespoon to measure equal parts of both solutions.
Once checked, you can mix it with a Popsicle stick in a mini plastic cup and mix it at a leisurely, balanced pace for two minutes. You have to combine one direction for one minute and switch handling to finish the second minute.
It is essential to stir slowly to reduce bubbles in the resin mixture. Once the resin is mixed, you will have a 30-minute window to begin pouring and setting their objects.
3. Fill Molds And Ornament Trays –

Before resin can be restored, objects need to be added to the mold or pendant tray. This is the fun part! It can cure almost anything in resin. Since most of the molds are portable, you will want to find small objects that will easily fit.
Having a few tweezers will prove beneficial since students will be working on such a microscopic scale.
Here are some of my best-loved fillers:
-small sugar candies like Skittles or M&M’s
-glitter
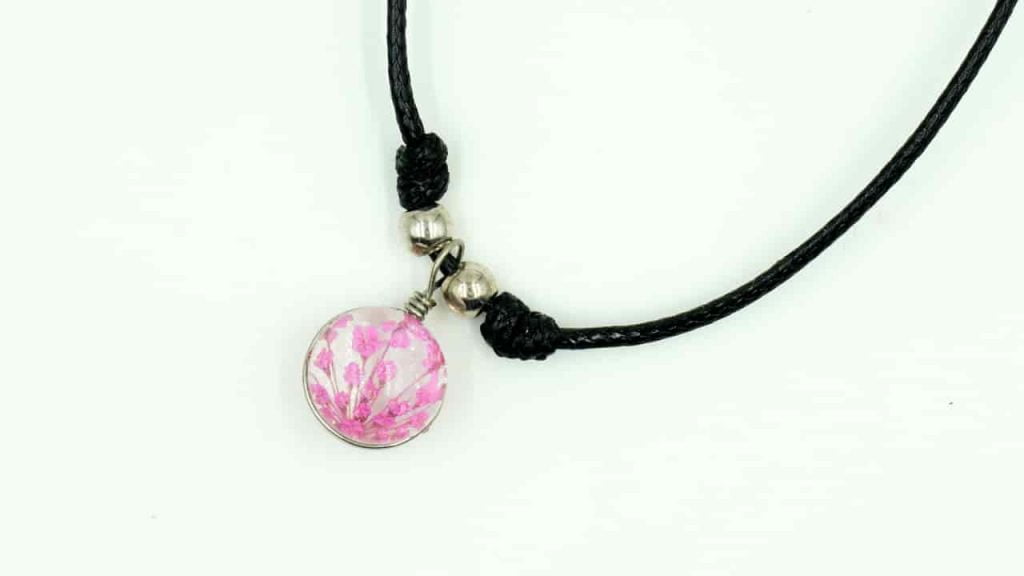
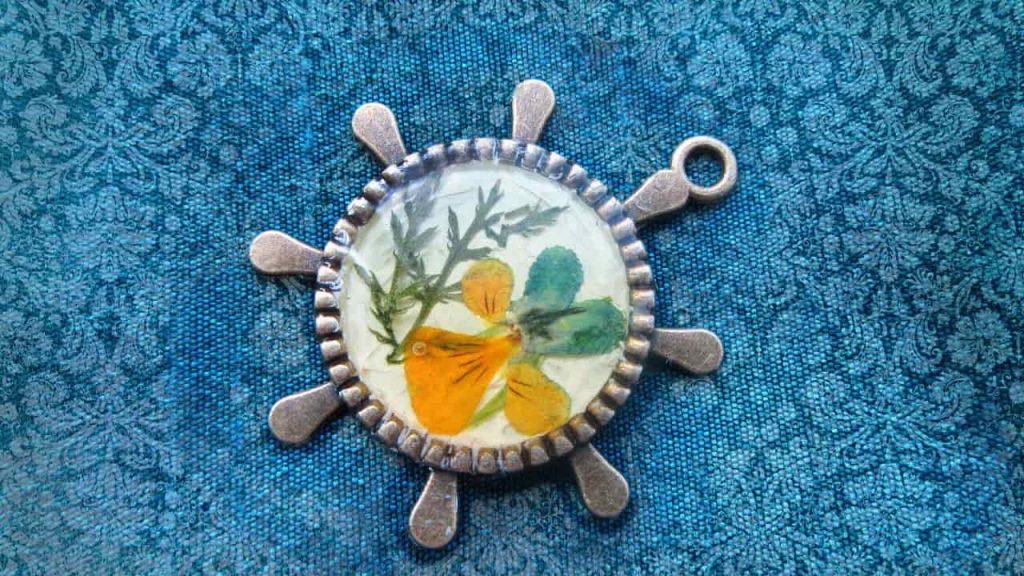
-pressed pearl and flower
-sprinkles
-colored sand
-yarn
The most suitable part about this step is that it will work if it fits like a glove! Would you mind encouraging yourself or your learners to bring in some of their favorite mini objects to turn into jewelry art?
You can also create mini paintings or drawings that can be used in the molds.
4. Pouring Resin –
Make sure the surface you are working on is the shield with wax paper. Once objects are arranged in the molds, pour resin over the tip. If you may want to put a little bit of resin in the molds, then fill with pieces and body, and finish by pouring more resin on the top.
This allows for a more uniform distribution of resin. The resin can be placed in a condiment container for a more precise application. At times when the resin is poured, tiny bubbles may appear.
You can use a toothpick for popping the bubbles or the heat from a blower dryer to get rid of these bubbles. For state-of-the-art, you can work in layers or coats.
You may fill the bottom of the mold with objects, settle it with resin, wait for it to dry, and then perform the process again.
5. Hold And Disclose –

Once resin objects have been cured for 24 hours, they will be primed to pop out of the molds! These objects should come out relatively quickly if utilizing the mold release and conditioner.
If the objects feel sticky or moist, this probably means the resin ratio to hardener was not 1:1. Sometimes, letting it cure longer will help if you rush into this situation.
However, if it still feels sticky after 48 hours, it will, sadly, remain that way. If you have worked with pendant trays, nothing more needs to be done! It is finished since the resin object will remain in the tray as the complete piece.
6. Finishing Touches –
If sharp edges have formed during curing or restoring, these can be easily removed with fine-grained sandpaper. Polishing paste and a soft cloth give the piece of jewelry a beautiful shine.
This is often missing if a conventional silicone mold was used during production. Crystal clear resin or glossy lacquer is also suitable as a finish to achieve the radiant effect.
However, you can save yourself this further transformation if you directly use a polished silicone mold. The smooth inner surface guarantees you the perfect, even surface of your epoxy resin jewelry.
Various findings like earring posts, necklace chains, clasps, and closures will allow many different pieces to be made. Attach the findings by pouring a tiny amount of resin, allowing it to set, or using a little dense to lock it in place.
7. Wear And Relish –
When all of these steps are complete, you will have beautiful pieces of wearable art you’ll be proud to show off!
Explore More Choices –
One of the exciting things about exploring resin objects with you can turn them into almost anything. Often art teachers may be discouraged from doing jewelry projects with students fearing they will not engage all the students.
This process can go over just jewelry, and art jewelry lovers can create various fun, profitable items. To appeal to the crowd that isn’t undoubtedly interested in jewelry, turn your resin objects into keychains, pins, magnets, or even costars.
There are so many prospects to explore! Working with resin does take a little custom, but once you start and share the process, art jewelry lovers will be eager to appreciate your work!
It is a process that provides you with a sense of accomplishment and success while also letting you wear your masterpieces!
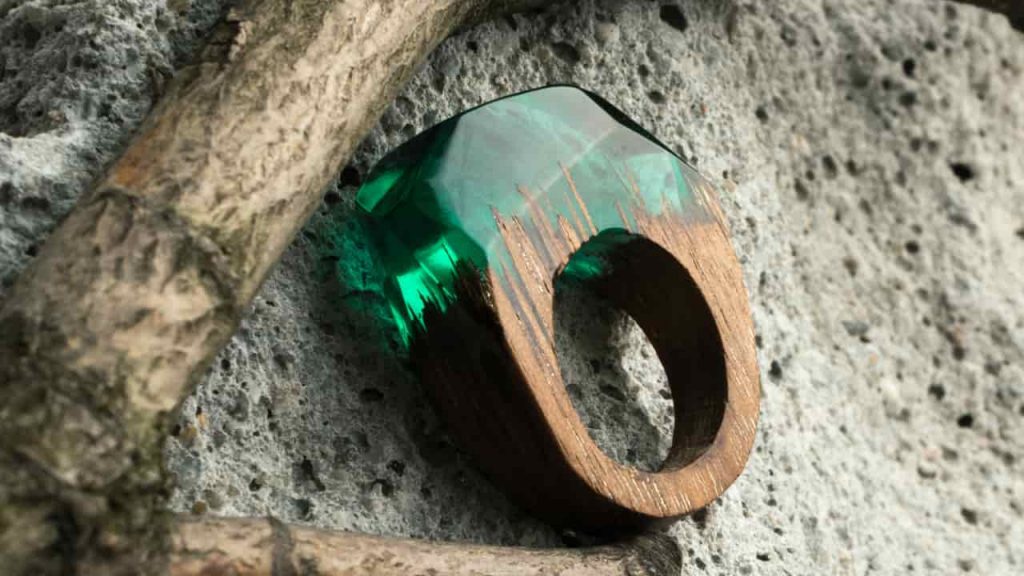
Make Wood and Resin Jewelry –
Resin jewelry that fuses the materials epoxy resin and wood looks particularly opulent and individual. But the manufacture of such epoxy resin jewelry is a bit more complex.
Before all else, one or more pieces of wood are put down in a (usually rectangular) silicone mold or a self-made mold. Then the mold is filled with the casting resin. The effect is stunning if the resin is colored before casting.
When the blank is completely hardened, it can be removed from the mold and further processed. You can now see it in the shape you want, then sand it down and polish it to the finish.
You can now see it in the shape you want, then sand it down and polish it to the finish.
Adversity With Resin Jewelry Making –
Let us have a look at a few issues that might occur when making your resin jewelry. We will also be looking at a few common questions people ask about resin jewelry making.
Submerged Flowers in Resin may turn yellow, lose luster, and Wither. If flowers are not appropriately managed before embedding into the resin, they will slowly fade and turn brown or yellow over time.
To keep the flowers looking fresh and firm, it is best to dry them and then treat them with fluoroscope lacquer. You can also add a bit of the same color paint to the flowers to keep them looking fresh.
Following the correct strategies when embedding flowers in resin jewelry is the only way to keep their shape and color.
Handmade Resin Jewelry awning to produce Bubbles –
The mixing process of the resin with the epoxy or thickeners will produce bubbles. To remove bubbles, you can use a pressure pot or degasser. This might be best for somebody who is repeatedly creating resin items, as the equipment is expensive.
It might be better for the beginner or part-time hobbyist to use a torch gun or even a toothpick to get rid of bubbles.
Resin Products can be detrimental in a Fluid State –
When the resin is still in its liquid state, and while mixing it, it can release harmful miasma. Once the resin is fully cured, it is non-toxic. Check that your hardener does not have any Bisphenol A and is certified food grade by the FDA.
In all instances, when working with epoxy resin, it is preferable to wear protective gear like gloves and a mask. Your work area should also be well ventilated and ideally in a separate room.
Resin turns pale over Time –
Most resins, after a while, turn yellow, especially if exposed to sunlight often. The quality of your resin and adding a UV filter or stabilizer will lengthen the time it takes for this to happen.
Frequently Asked Questions
How to make Resin Jewelry with dried or desiccated Flowers?
You have to dry the flowers with silica sand. The alternative option: Buy the already dried flowers or fragrant pieces so you can begin right away.
Pour a little bit of epoxy or any other resin into a jewelry mold and place the flower in it. Fill up the resin jewelry mold with resin and wait until the piece is dried.
Is Resin Safe For Making Art Jewelry?
Epoxy Resin, developed for use with Jewelry, is non-toxic after curing. You can always ask the creator of your Resin to find out how safe his product is for wearing as Jewelry.
Is Resin Jewelry waterproof?
Yes, resin jewelry is waterproof. Since the metals used in manufacturing the jewelry can get damaged or impaired, it is preferable if you remove any jewelry when showering or working with water in any way.
How long does Resin Jewelry last?
Resin jewelry can last a surprisingly long time, it is best to avoid exposing the jewelry to intense heat, and you need to take care of it appropriately.
Is Resin Jewelry safe for Children?
Once cured and the resin goes hard, it is safe for children and pregnant women to wear. On the other hand, an epoxy coating or pouring, which overlays a concrete floor, is also relatively safe for children and everyone, including your pets, once hardened. Therefore, some might be allergic to the epoxy coating.
Conclusion
These are the most acceptable ways to work with resin as a crafter. The process is quite simple and easy to do, as long as you follow the instructions correctly. Remember to sand and polish for the perfect look to get a long-lasting, beautiful resin jewelry piece. You are now at the end of your origination journey into resin jewelry making. From here, you have a great understanding of resin and know how to make your creative ideas happen.