
The most memorable moments of your life will always include blooms. Flowers have always been a reliable source of happiness for you, whether on one of your many milestone birthdays or the day of your wedding.
Like the rest of us, you have those flowers tucked away in valuable containers or books, right?
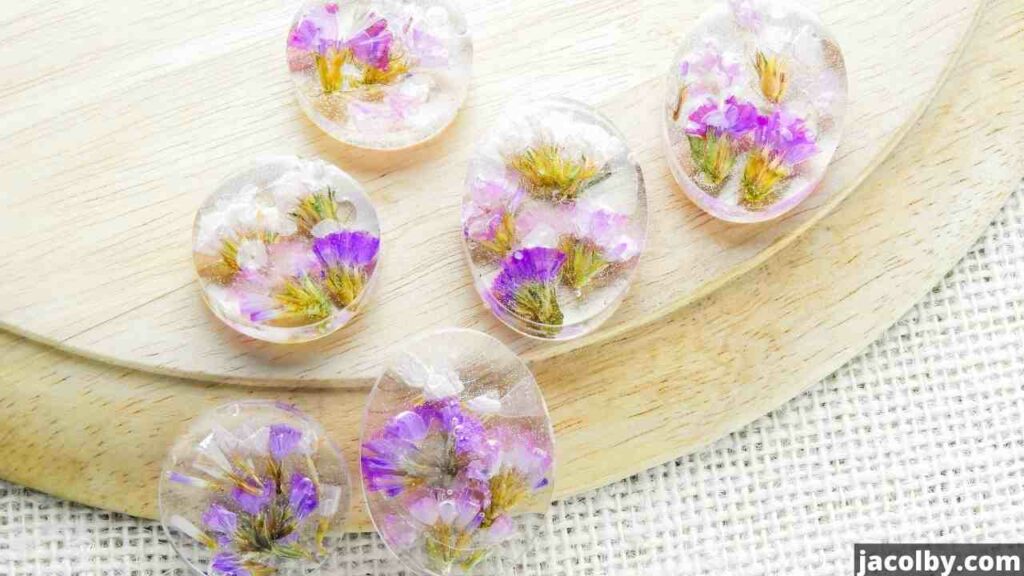
It is time to get those dried flowers out of storage and turn them into something that will last forever and ever, such as posh jewelry or an elegant showcase.
Keep reading down to discover how to capture the beauty of your favorite flowers in resin so that you may enjoy them for years.
Table of Contents
The Necessary Components Required for Flowers Cast in Resin –
The good news is that you may simply do it yourself at home by preserving flowers in resin. Resin flowers are an excellent DIY and crafts method that you may learn to love.
To preserve flowers in resin, you’ll need a few simple items:
1. Appropriate dried flowers
2. Precise, pourable casting resin forms to cast
3. A resin release compound for removal of the dry resin item from its mold.
4. The use of latex or other rubber gloves for protection
5. Protection from the elements: a face mask with a respirator
6. Protective eyewear
7. Plastic cups to mix the resin
8. Stir sticks made of wood
9. To pop air bubbles, a hairdryer or blowtorch
10. To remove bubbles, toothpicks, or skewers.
11. A resin-curing pressure cooker.
12. Epoxy resin (check the best Epoxy resins for flowers)
What is the best way to dry the flowers?

Thus, we get to the question of how, exactly, you will dry the flowers. Flowers may be dried (and pressed) in a variety of methods. The techniques below need freshly cut flowers.
1. Flowers book-pressed –
Flowers are often preserved between book pages. This is reminiscent of childhood art endeavors and may be done at home. A substantial book and flowers will do.
It’s easy. Put a flower over a book page. Put the bloom halfway into a thick, hefty book to provide proper pressure.
Flower petals should not be folded or crumpled. Press the book shut and let it dry flat.
Adding weight to the book might help apply more significant pressure. The bloom should dry for two to three weeks. The book flattens and dries the flower while preserving its color.
The sealed book keeps the blossom oxygen-free. Don’t open it up while this dries to preserve the flower’s color. Again when the flower is dried, you may cast it.
2. Silica gel-dried flowers –
Homemade silica gel flower dryer. Pick flowers. Dry them if they’re wet. Silica gel fills a container’s bottom. 1″ thick is ideal. This gel contains silica gel particles that absorb moisture.
Place trimmed flowers upright in silica gel. Cover the blooms with silica gel. Don’t bruise or shatter any petals. Cover the flowers until no petals remain. Then leave the sealed container for 6–8 days.
After that, you’ll need to open the jar and carefully take out the dried blossoms. These should be firm and dry yet remain colorful. Remove any residual silica crystals. This is an easy method to preserve flowers at home.
3. Air-drying –

To preserve flowers, hang them to dry. This must be done in a dark, dry, well-ventilated environment. Attics work. Create a flower washing line using a rope or thread. This needs tightening.
Take your flowers, in bunches or individually. Tie the flower stems on the “washing line” to hang upside down. Once fastened, leave flowers for three weeks. They’ll be dry and waiting when you return.
4. Flowers microwaved –
Microwaves dry flowers the quickest. Some may be intimidated, but it’s easy. Put flower petals or complete blooms on paper. Cover the flower with folded paper.
After that, put the paper with the flower in a microwave-safe dish towel and press down with a weight. Glass works. Then, microwave the bloom in 10-second bursts until dry.
Overheating the flower in the microwave might blacken it. This strategy is incredibly effective once you discover the perfect moment.
Detailed Instructions for Preserving Flowers in Resin –
Having provided you with everything you’ll need, let’s start preserving flowers in resin. Flowers may be preserved in resin in a matter of minutes, and the process can be learned in minutes.
Every age group may enjoy and benefit from this pastime. To get started, pay close attention and follow the step-by-step instructions I have provided below.
1. Making Preparations for the Mold –
Now is the time to thoroughly ensure that your molds have been adequately prepared and that all your supplies have been arranged and are ready to use.
Silicone molds release the completed product more easily. Before starting, coat each mold with a release agent. This helps the resin cast pop out of the mold.
2. Resin-mixing –
During the second step, which consists of mixing the resin, you will need to begin by mixing it together to prepare it for pouring and curing.
Casting resins have two ingredients that must be combined to activate: hardener and resin. Once united, a cure will commence. After mixing the resin, work swiftly before it hardens.
The resin must be thoroughly blended at a precise ratio. Pour into an easy-to-pour plastic cup or jug. Mix resin with wooden sticks.
At this point, you also have the option of coloring the resin by including mica powder, dyes, or pigments into the mixture. For conserving flowers, keep the resin transparent so you can see them after curing.
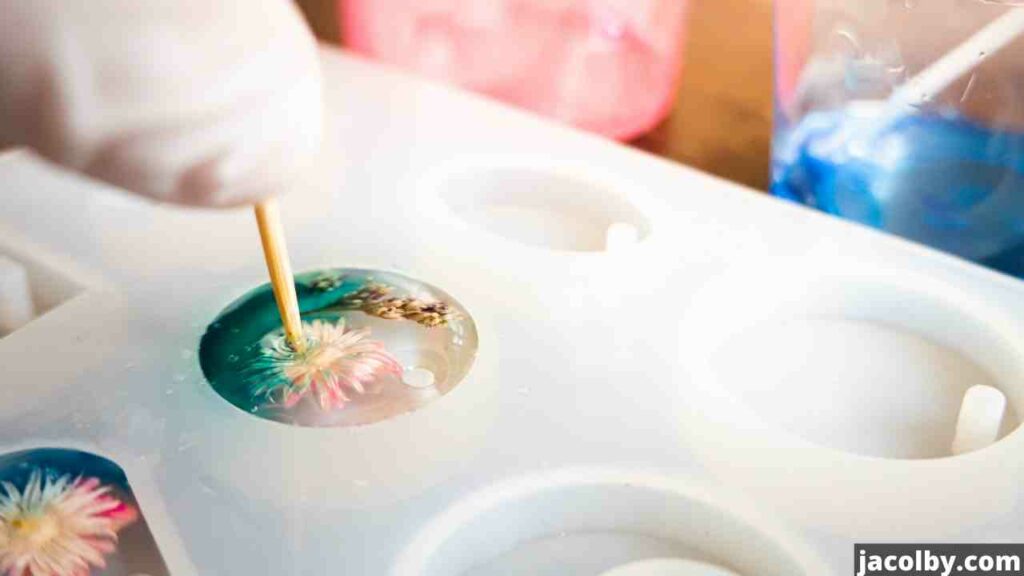
3. Arrange the Flowers and Spread the Base –
After mixing the resin, pour it. Pour resin into molds. This is mid-mold. Place dried flowers on resin. Teazers make this task easier.
Check that the flower is arranged precisely as you want it to be when the product is complete, and make any necessary adjustments now.
4. Creating the Model Through Casting –
During this process stage, you will be responsible for pouring resin into the remaining portions of the mold. Fill the mold with resin and flowers.
A toothpick or skewer may keep the flower in place while the resin hardens, but you may find that you need to use both. Now fill your mold with resin and place the flower inside.
5. Eliminating the Existence of Air Bubbles –
At this time, bubbles may occur. Bubbles must be removed before the resin dries, or they’ll remain in the completed product. Air bubbles may be removed through many methods.
Pop bubbles with a toothpick or skewer. This works for molds with fewer bubbles. You may want to try using a blowtorch or hairdryer if there are a lot of bubbles.
Heat the resin slowly. Slowly and gently heat the resin. Heat should remove bubbles. Pressure-curing resin is another option. While this method helps reduce air bubbles, most amateur crafters don’t have a pressure cooker.
6. Resin-curing –
To complete the process, you must wait for the resin to set and cure before moving on to the next stage. A cardboard box or similar item may cover the resin and keep dust and insects out of the wet material.
Let the molds cure. Depending on the substance, curing might take 12 to 72 hours. Twenty-four hours usually suffices. Once the castings have been removed from the silicone molds, they are complete.
Optionally, finish the resin. Sand and polish the resin. Use sandpaper with a fine grain to wet-sand the resin until you have a finish that is perfectly smooth and even throughout the whole surface.
Wash, dry, and polish as desired. This creates a clean, bright cast resin item.
Advice and Suggestions for Working with Flowers and Epoxy Resin –
It’s not hard to include flowers into resin casting creations, but there are certain things to keep in mind along the way. Here are some strategies you may use to optimize the use of resin and flowers in each and every project.
1. Make sure your blossoms are totally dry before arranging them –
Flowers often contain a lot of moisture, typically 80-90% water. This implies you should try eliminating as much water as possible during flower drying.
You’ll need to be patient because if you try to preserve your flowers too soon, they’ll rot from the inside out, damaging the whole project.
2. It is best to purchase dried flowers in advance –
Although I’ve given you several techniques to dry flowers, this may be the best option if you have a time-sensitive assignment. Dried flowers may be purchased almost anywhere and used right out of the package (literally).
These flowers have a lot of variabilities, so you can use them for numerous crafts and give variety to a workpiece if you encase more than one.
3. Crystal Resin is the Best Way to Preserve Flowers –
In addition to the various resin varieties available today, many resin brands can also choose from.
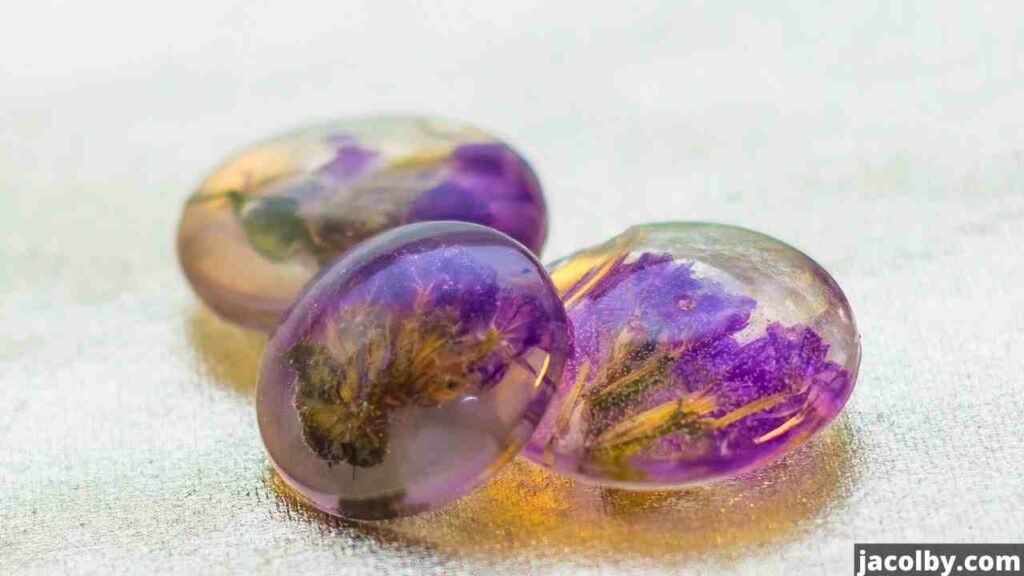
When keeping flowers in resin, crystal resin is preferable since it allows the bloom to be seen without buffing or polishing.
FAQs –
Are Resins Safe for Fresh Cut Flowers?
If you prefer fresh flowers over dried ones, you may wonder whether or not fresh flowers can be preserved in resin.
Although this may be done, mastering the skill of preserving fresh flowers in the resin can be challenging. The flowers themselves can quickly get discolored. Drying the flowers is something we suggest doing.
When submerged in resin, will flowers hover?
Flowers do float naturally in resin. This may be avoided by pouring the resin into layers, which is the recommended method.
First, pour a thin coating, then position the flower where you want it, and last, pour another layer on top.
How Long Will Dried Flowers Last When They Are Preserved in Resin?
You inquire how long flowers may be preserved in resin. It is possible that the correct response to this issue is not apparent.
In point of fact, various flowers have a range of potential longevity, determined mainly by the quality of the drying process and the degree to which the casting is airtight.
Conclusion
Now that you have the formula to infuse your beloved flowers and associated feelings into resin let your imagination soar and create the most significant art creation worth remembering.
However, before you begin your adventure, follow the appropriate guidelines and advice I provided above.